image source: https://coloringupdate.com
Welcome to our guide on how to draw a cat! Cats are one of the most beloved animals, known for their grace, agility, and adorable antics. Whether you’re a beginner or an experienced artist, learning how to draw a cat can be a fun and rewarding experience. In this tutorial, we’ll take you through step-by-step instructions on how to capture the unique features and personality of a cat in your drawings. So grab your pencils and let’s get started on this feline adventure!
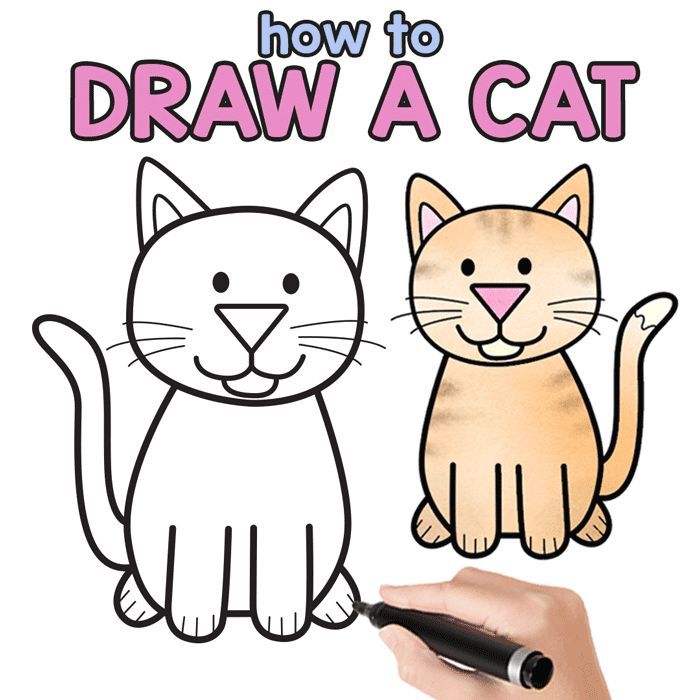
Step-by-Step Guide: How to Draw a Cat Like a Pro
Drawing a cat can seem like a daunting task, but with the right techniques and practice, you can become a pro at creating realistic and adorable feline portraits. Whether you’re an aspiring artist or just looking for a fun new hobby, follow these step-by-step instructions to draw a cat like a pro.
Step 1: Gather Your Materials
Before you start drawing, make sure you have all the necessary materials. You will need a pencil, eraser, paper, and any other preferred drawing tools such as colored pencils or markers. It’s important to use good quality materials to ensure your drawing turns out the way you want it to.
Step 2: Study the Anatomy of a Cat
To accurately draw a cat, you need to understand its anatomy. Take some time to observe cats in real life or look at reference images to familiarize yourself with their body structure. Notice their body proportions, the placement of their features, and the shape of their ears and paws.
Step 3: Start with Basic Shapes
Begin by lightly sketching out the basic shapes of the cat’s body. Use circles and ovals to outline the head, body, and limbs. This will serve as a guide for the rest of your drawing.
Step 4: Add Details
Once you have the basic shapes in place, start adding more details. Use reference images to help you draw the eyes, nose, mouth, and ears in the correct positions. Pay attention to the direction of the fur and use short, quick strokes to create a realistic texture.
Step 5: Focus on the Eyes
The eyes are the most expressive feature of a cat. Take your time to carefully draw them, making sure they are symmetrical and have a lifelike quality. Use shading to create depth and add a spark of life to your cat’s gaze.
Step 6: Define the Fur
A cat’s fur can be a bit tricky to draw, but with practice, you can master it. Use short, overlapping strokes to create a sense of texture and dimension. Vary the pressure of your pencil to create different shades and tones, making the fur look more realistic.
Step 7: Don’t Forget the Whiskers
Whiskers are an important feature of a cat’s face, so be sure to include them in your drawing. Use a thin, sharp pencil to draw them, and remember that they grow out from specific points on the cat’s face.
Step 8: Add Color (Optional)
If you want to add color to your drawing, use colored pencils or markers to carefully shade and blend different tones. Again, use reference images to help you accurately depict the colors and patterns of the cat’s fur.
Step 9: Practice, Practice, Practice
Drawing takes practice, so don’t get discouraged if your first few attempts don’t turn out the way you want them to. Keep practicing and experimenting with different techniques until you feel confident in your abilities.
Step 10: Have Fun!
The most important step in drawing a cat like a pro is to have fun with it! Cats are playful and expressive creatures, so let your drawing reflect that. Don’t be afraid to add your own personal style and make the drawing uniquely yours.
In conclusion, drawing a cat like a pro takes patience, practice, and attention to detail. By following these steps and putting in the time, you can create beautiful and realistic cat drawings that will impress your friends and family. Remember to have
Master the Art of Drawing a Cat with These Easy Tips
Drawing a cat can seem like a daunting task, especially if you are new to drawing. However, with a few easy tips, you can master the art of drawing a cat in no time. Whether you are looking to improve your drawing skills or just want to create a cute cat doodle, these tips will help you achieve your goal.
1. Start with basic shapes
Before you can draw a realistic cat, it is important to understand the basic shapes that make up its body. Start by drawing a large oval for the body and a smaller circle for the head. Then, add two smaller ovals for the ears and four smaller circles for the paws.
2. Pay attention to proportions
One of the key elements of a successful cat drawing is getting the proportions right. Cats have a long and slender body, so make sure your oval for the body is longer than it is wide. The head should also be proportionate to the body, not too big or too small.
3. Add details to the face
The face is what gives a cat its character, so pay special attention to the details. Draw two almond-shaped eyes above the nose, and add a small nose and mouth. Cats also have long whiskers, so be sure to include those as well.
4. Don’t forget the tail
A cat’s tail is an important part of its body and can add movement and personality to your drawing. Most cats have a long and fluffy tail, so use curved lines to create a flowing effect.
5. Use shading to add depth
Shading is what gives a drawing dimension and brings it to life. Use a light touch and a pencil to create shading on the body, making sure to follow the contours of the cat’s form. This will create a three-dimensional effect and make your drawing more realistic.
6. Practice makes perfect
As with any skill, practice is key to mastering the art of drawing a cat. Try drawing different types of cats, from domestic to wild, to improve your skills and develop your own unique style.
7. Use reference images
If you are struggling to draw a cat from memory, don’t be afraid to use reference images. Look at pictures of cats or observe real cats to get a better understanding of their anatomy and movement.
8. Experiment with different mediums
Don’t limit yourself to just using a pencil. Try drawing a cat with different mediums such as charcoal, colored pencils, or markers to add texture and color to your drawing.
9. Be patient
Drawing takes time and patience, so don’t get discouraged if your first attempts don’t turn out exactly how you want them to. Remember to take breaks and come back to your drawing with fresh eyes.
10. Have fun with it!
Drawing is a form of self-expression, so don’t be afraid to have fun and let your creativity flow. Cats are playful and mischievous creatures, so let that energy guide your drawing and have fun with it.
In conclusion, drawing a cat may seem challenging, but with these easy tips, you can master the art in no time. Remember to start with basic shapes, pay attention to proportions, add details to the face, and use shading to add depth. Practice, be patient, and have fun with it, and you will soon be drawing adorable cats with ease.
Unleash Your Inner Artist: Learn How to Draw a Cat in 5 Simple Steps
Drawing is a fun and creative activity that allows you to express yourself and unleash your inner artist. While some people may think that drawing is a talent that you are born with, the truth is that anyone can learn how to draw with practice and patience. In this tutorial, we will guide you through the process of drawing a cat in 5 simple steps. So grab your pencils and let’s get started!
Step 1: Start with Basic Shapes
Before diving into the details of drawing a cat, it is important to first establish the basic shapes that make up its body. Begin by drawing a large oval for the head, followed by a smaller oval for the body. Then, add two smaller circles for the ears and a smaller oval for the nose.
Step 2: Add Details to the Face
Next, it’s time to add some features to the cat’s face. Using the smaller circle as a guide, draw two almond-shaped eyes and a small triangle for the nose. Then, add two small dots above the eyes for the pupils. Next, draw two curved lines for the mouth and a small line for the whiskers.
Step 3: Define the Body
Now that the face is complete, it’s time to add some definition to the cat’s body. Draw two curved lines from the head to the body to create the neck. Then, draw two curved lines from the body to create the back and tail. Don’t worry about making these lines perfect, as cats come in all shapes and sizes.
Step 4: Add Legs and Paws
Next, it’s time to add some legs and paws to your cat. Using the basic shapes as a guide, draw four curved lines for the legs. Then, add small ovals at the end of each leg for the paws. You can also add some detail to the paws by drawing small lines for the toes.
Step 5: Add Fur and Details
To give your cat a more realistic look, add some fur and details. Start by adding some short, curved lines throughout the body to represent fur. Then, add some shading to the face, ears, and body to give your cat some dimension. You can also add some stripes or spots to make your cat unique.
Congratulations, you have successfully drawn a cat in just 5 simple steps! Remember, practice makes perfect, so don’t be discouraged if your first attempt doesn’t turn out exactly how you wanted. With time and practice, you will improve your drawing skills and be able to create even more detailed and realistic drawings.
Drawing is a wonderful way to express your creativity and improve your hand-eye coordination. So don’t be afraid to continue practicing and experimenting with different techniques. Who knows, you may even discover your own unique style of drawing cats. Have fun and keep on drawing!In conclusion, learning how to draw a cat can be a fun and rewarding experience. By following these simple steps and practicing regularly, you can improve your skills and create realistic and unique cat drawings. Remember to be patient and have fun while exploring your artistic abilities. With these tips, you can create purr-fect cat drawings that are sure to impress both friends and search engines alike. So go ahead and start drawing your feline friends with confidence and creativity!
